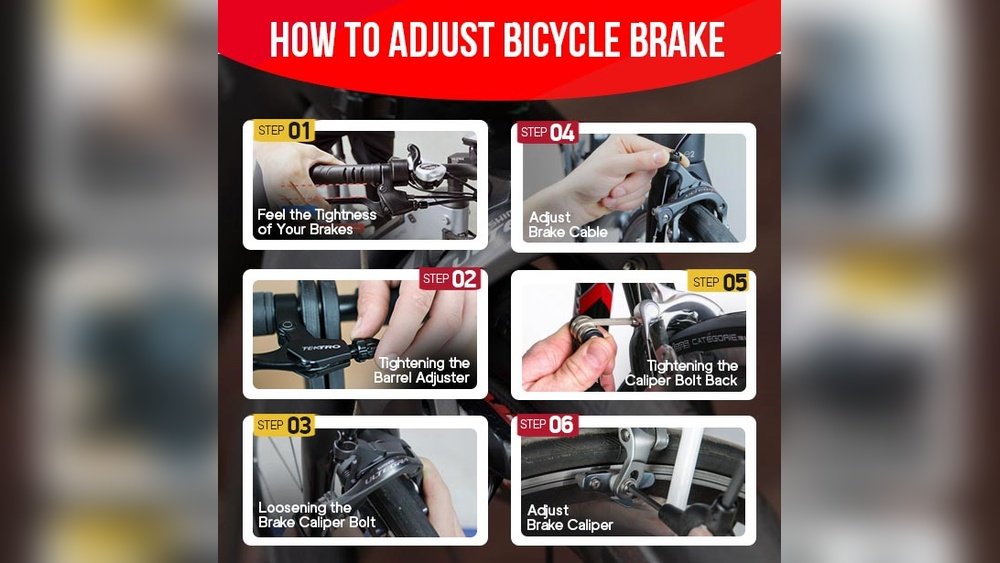
Are your bicycle brakes feeling loose or not stopping your bike as well as they should? Knowing how to adjust caliper bicycle brakes can make a huge difference in your safety and riding experience.
You don’t need to be a mechanic or have special tools to get your brakes working smoothly again. In this guide, you’ll learn simple, step-by-step tips to fine-tune your brakes quickly and confidently. Keep reading, and you’ll be back on the road with brakes that respond just the way you want.
Tools Needed
Adjusting caliper bicycle brakes requires a few basic tools. Having the right tools makes the job easier and safer. You do not need many items, but each one plays an important role. Keep these tools ready before starting your brake adjustment.
Allen Wrenches
Allen wrenches, or hex keys, fit the bolts on most caliper brakes. Sizes 4mm and 5mm are the most common. They help you loosen and tighten the brake arms and brake pads.
Screwdrivers
A Phillips or flathead screwdriver is needed for some brake models. They adjust the brake pad position and fine-tune the brake tension. Choose the right type to avoid damaging screws.
Adjustable Wrench
An adjustable wrench works on nuts that hold the brake caliper to the bike frame. It provides extra grip and control. Use it gently to avoid slipping and scratching.
Bike Stand Or Repair Block
A bike stand or repair block holds your bike steady. It lifts the wheel off the ground for better access. This tool helps you test the brake while adjusting.
Rag Or Cloth
A clean rag or cloth wipes dirt and grease from the brake parts. Clean parts give better grip and help you see what you are doing. Keep a rag nearby for quick cleaning.
Identify Brake Components
Before adjusting caliper bicycle brakes, know their parts well. Identifying each component helps make precise adjustments easier. This section breaks down the main parts of caliper brakes.
Brake Caliper Arms
Brake caliper arms hold the brake pads and move them towards the wheel rim. They pivot on a bolt attached to the bike frame or fork. Both arms should move smoothly and evenly.
Brake Pads
Brake pads press against the wheel rim to stop the bike. They wear down over time and need replacement. Check their position and alignment for effective braking.
Brake Cable
The brake cable connects the brake lever to the caliper arms. Pulling the lever tightens the cable, moving the arms. The cable should be free of rust and securely attached.
Spring Mechanism
Springs inside the caliper arms push them back after braking. They keep the pads away from the rim when not in use. Make sure springs are not damaged or loose.
Adjustment Barrel
The adjustment barrel fine-tunes cable tension without tools. Turning it changes how tight the brake feels. Use it for small tweaks after main adjustments.
Check Brake Pad Alignment
Proper brake pad alignment is key for safe and smooth braking. Misaligned pads can cause uneven wear and weak stopping power.
Check the pads to ensure they touch the rim flatly. This helps the brakes work effectively and last longer.
Inspect Pad Position
Look at the brake pads from the side. They should sit evenly against the rim’s surface.
The entire pad should make contact with the rim, not just the top or bottom edge.
Adjust Pad Height
Loosen the bolt holding the brake pad. Move the pad up or down to align with the rim.
Make sure the pad does not touch the tire or hang below the rim edge.
Tighten the bolt once the pad sits in the right position.
Check Pad Angle
Brake pads should be parallel to the rim’s braking surface. Avoid tilting forward or backward.
A slight toe-in, where the front of the pad touches first, reduces brake squeal.
Test Brake Function
Squeeze the brake lever and watch the pads move. They should hit the rim evenly on both sides.
Spin the wheel to ensure it stops smoothly without rubbing pads.
Credit: www.youtube.com
Loosen Mounting Bolts
Loosening the mounting bolts is the first step in adjusting caliper bicycle brakes. These bolts hold the brake caliper firmly to the bike frame or fork. Loosening them allows you to move the caliper and align the brake pads properly. This step is essential for smooth brake operation and even pad wear.
Take care to loosen the bolts just enough to allow movement. Too much loosening can cause the caliper to fall out of place. Use the right tool, usually an Allen wrench, for this task. Make sure the bike is stable before you start working.
Identify The Mounting Bolts
Look closely at the brake caliper to find the mounting bolts. They are usually located near the center of the caliper. These bolts attach the caliper to the frame or fork. Knowing their exact position makes loosening easier and safer.
Use The Correct Tool
Choose an Allen wrench or hex key that fits the mounting bolts well. Using the wrong size can strip the bolts. A good fit ensures smooth loosening without damage. Keep the wrench steady while turning.
Loosen The Bolts Carefully
Turn the mounting bolts counterclockwise to loosen them. Loosen just enough to allow the caliper to move freely. Avoid removing the bolts completely. This helps keep the caliper attached but adjustable.
Check Caliper Movement
After loosening, gently wiggle the caliper side to side. It should move without resistance. If it feels stuck, loosen the bolts a bit more. Proper movement is crucial for accurate brake adjustment.
Adjust Brake Pads Position
Adjusting the brake pads position is key to safe and smooth braking. The pads must touch the rim correctly for the brakes to work well. Too high or low, and the pads may miss the rim or rub the tire. Proper pad placement improves stopping power and prevents damage.
This step focuses on aligning the pads evenly with the rim. It takes a few minutes but makes a big difference. Follow simple steps to set the brake pads in the right spot.
Loosen The Brake Pad Bolts
Start by loosening the bolts that hold the brake pads. Use an Allen wrench or the right tool. Do not remove the bolts completely. Just loosen enough to move the pads freely.
Position The Pads Correctly
Place the pads so they sit flat against the rim. The whole pad surface should touch the rim. Keep the pad parallel to the rim edge. Avoid tilting it up or down.
Make sure the pad is clear of the tire. The pad should not touch the tire at all. This prevents wear and damage to both parts.
Check The Pad Height And Angle
Set the pad height so it covers the rim braking surface. Leave a small gap at the rim edge to avoid rubbing. Adjust the angle so the pad contacts evenly during braking.
Tighten The Bolts Securely
Hold the pads in place and tighten the bolts firmly. Use the right tool to avoid slipping. Check that the pads do not move after tightening.
Test The Brakes
Squeeze the brake lever to test pad contact. The pads should hit the rim evenly on both sides. No rubbing or uneven contact should occur. Adjust again if needed.
Tighten Bolts Securely
Tightening the bolts on your caliper bicycle brakes is a key step. It keeps the brakes steady and safe. Loose bolts can cause poor braking or damage parts. It also stops the brakes from moving out of place during rides. Use the right tools and tighten bolts carefully. Strong, secure bolts help your bike stop well every time.
Tighten The Mounting Bolt
Start with the main mounting bolt. It holds the caliper to the bike frame. Use a wrench or Allen key to turn it clockwise. Tighten until firm, but do not over-tighten. Over-tightening can strip the threads or crack the frame. The bolt should hold the caliper solidly without any wiggle.
Secure The Brake Pads Bolts
Next, check the bolts on the brake pads. These bolts keep the pads in place on the caliper arms. Use the correct size Allen key or wrench. Turn the bolts clockwise to tighten them well. Make sure the pads do not move or twist. Properly tight bolts help pads hit the rim evenly.
Check Quick-release Lever Tightness
Many caliper brakes have a quick-release lever. This lever allows easy opening of the brake for wheel removal. Ensure the lever closes tightly and holds the caliper firm. Adjust the tension screw if needed. The lever should snap closed without too much force. A loose lever can cause brake failure.
Use A Torque Wrench For Precision
For best results, use a torque wrench. This tool measures the exact tightness of bolts. Follow the manufacturer’s torque specs for your brake model. Proper torque prevents over-tightening or under-tightening. It protects your bike parts and improves brake performance. A torque wrench ensures bolts are tight and safe.
Set Cable Tension
Setting the cable tension is key for smooth brake performance. Proper tension makes the brakes responsive and safe. Too loose means weak braking. Too tight causes drag or brake rub. Adjusting cable tension is simple but important.
Loosen The Cable Anchor Bolt
Start by loosening the bolt that holds the brake cable. Use an Allen wrench or a small spanner. Loosen just enough to move the cable freely. This step frees the cable to adjust its length.
Pull The Cable Tight
Pull the brake cable firmly by hand. Tighten it until the brake pads almost touch the rim. Do not pull too hard. The pads should be close but not rubbing the wheel. This sets the base tension for good braking.
Tighten The Cable Anchor Bolt
Hold the cable in place and tighten the anchor bolt. Make sure the cable does not slip. Tighten firmly but avoid stripping the bolt. This locks the cable tension firmly in place.
Test The Brake Lever
Squeeze the brake lever several times. Check if the brake pads grip the rim quickly. The lever should feel firm but not stiff. Adjust again if the tension feels wrong. Small changes can improve brake response.

Credit: www.the-house.com
Test Brake Performance
Testing your caliper bicycle brakes is essential after adjustment. It ensures your safety and smooth riding. This step lets you check if the brakes respond well and stop the bike properly. Testing is quick and simple but very important.
Check Brake Lever Feel
Press the brake lever gently. It should feel firm and not too loose. If it feels soft or spongy, the brake pads may not touch the wheel enough. Adjust the lever or brake pads until the feel is solid.
Perform A Slow Ride Test
Ride your bike slowly in a safe area. Squeeze the brake lever to see how fast the bike stops. The bike should stop quickly without needing to pull the lever hard. If it doesn’t, the brakes need more adjustment.
Inspect Brake Pad Contact
Look at the brake pads while squeezing the lever. They must touch the rim evenly on both sides. Pads should not hit the tire or miss the rim. Adjust the caliper arms if the pads are uneven.
Listen For Unusual Noises
Brake sounds tell a lot about performance. Squeaking or grinding means the pads might be worn or misaligned. Clean or replace the pads if noise continues. Good brakes work quietly and smoothly.
Fine-tune Adjustments
Fine-tune adjustments make your caliper brakes work smoothly and safely. Small changes can improve brake response and feel. These tweaks help the brake pads contact the rim evenly. This reduces noise and wear. Follow these steps to get the best brake performance.
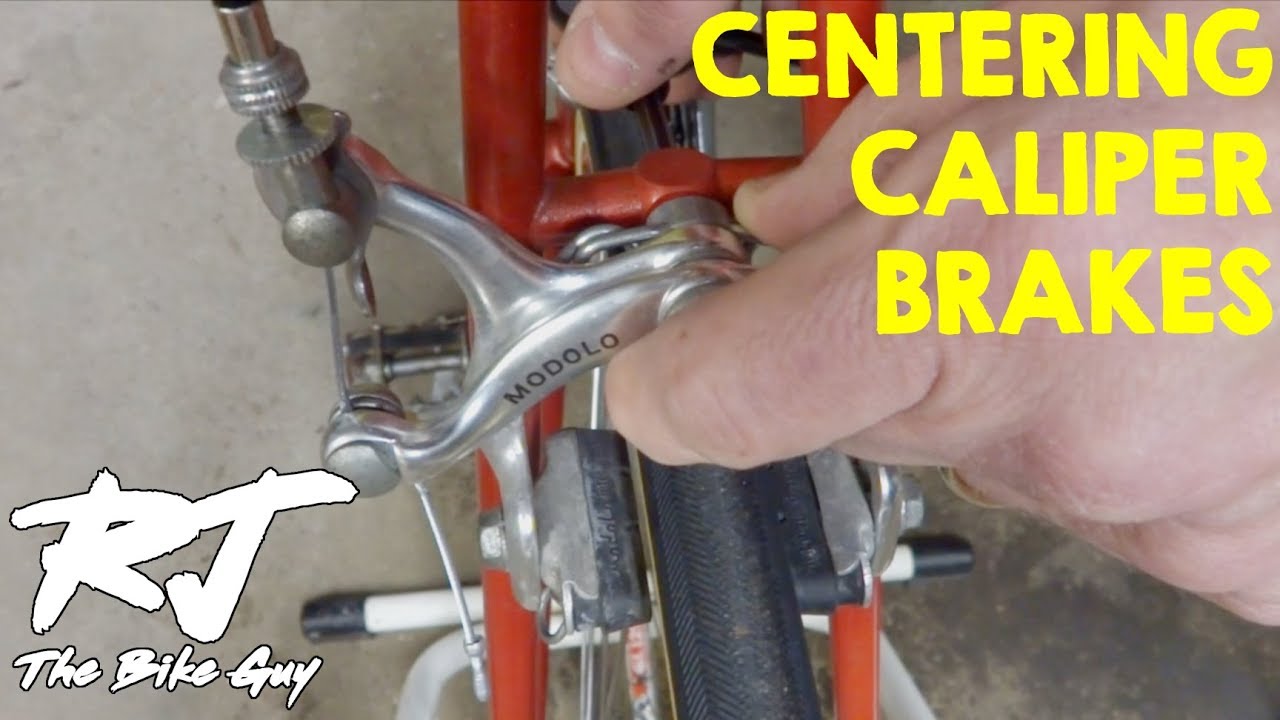
Center The Brake Caliper
Loosen the bolt holding the caliper to the frame slightly. Squeeze the brake lever to bring pads close to the rim. While holding the lever, tighten the bolt again. Check the pads sit evenly on both sides of the rim. Adjust if one pad touches before the other.
Adjust The Pad Position
Loosen the pad fixing bolt. Move the pad so it hits the rim squarely, not the tire. The pad should cover the rim surface fully. Avoid pad contact with spokes or tire. Tighten the bolt securely after adjusting the pad.
Set The Cable Tension
Use the barrel adjuster on the brake lever or caliper. Turn it to fine-tune cable tightness. Tight cable means quicker brake response. Loose cable causes a soft lever feel. Adjust until the lever feels firm with good pad contact.
Test The Brake Lever Travel
Squeeze the lever fully to check pad contact. The lever should not touch the handlebar. If it does, increase cable tension or pad adjustment. Proper lever travel ensures safe braking power and control.
Common Issues And Fixes
Caliper bicycle brakes often face common problems that affect performance. These issues can cause poor stopping power or uneven brake pad wear. Identifying and fixing these problems keeps your brakes working smoothly and safely.
Understanding typical problems helps you save time and money. Many fixes require only basic tools and simple steps. Below are frequent brake issues and how to solve them effectively.
Brake Pads Not Aligning Properly
Misaligned brake pads reduce braking power and cause noise. Pads should touch the rim evenly and fully when you squeeze the brake lever. Adjust the pad position by loosening the mounting bolt. Move the pad until it sits flat on the rim. Tighten the bolt and test the brake again.
Brake Lever Feels Loose Or Spongy
A loose or spongy brake lever indicates cable slack or air in the cable housing. Tighten the brake cable by turning the barrel adjuster near the lever. If this does not help, check the cable for damage or rust. Replace the cable if needed and lubricate it for smooth action.
Brakes Rub Against The Rim
Brakes that rub the rim without pressing the lever waste energy and slow the bike. This happens if the calipers are not centered. Loosen the caliper mounting bolt slightly. Squeeze the brake lever to center the calipers. While holding the lever, tighten the bolt. Release the lever and check for rubbing.
Brake Pads Wear Unevenly
Uneven pad wear reduces braking efficiency and can damage the rim. Check the pad angle and spacing. Pads must contact the rim fully and parallel. Adjust the pad angle by loosening the mounting bolt. Shift the pad until it wears evenly. Replace worn-out pads to maintain safety.
Credit: www.youtube.com
Frequently Asked Questions
How Do I Center Caliper Bicycle Brakes?
To center caliper brakes, loosen the mounting bolt slightly. Squeeze the brake arms together evenly. Tighten the bolt while holding the arms centered. Ensure pads align symmetrically on the rim for balanced braking.
What Tools Are Needed To Adjust Caliper Brakes?
You’ll need a 5mm Allen wrench, a Phillips screwdriver, and sometimes pliers. These tools help loosen bolts, adjust pad positions, and fine-tune brake tension for optimal performance.
How Tight Should Caliper Brake Cables Be?
Brake cables should be taut but not overly tight. Tighten until brake pads almost touch the rim. This ensures quick brake response without causing drag or rubbing.
When Should I Adjust My Caliper Bicycle Brakes?
Adjust brakes if you notice squealing, poor stopping power, or uneven pad wear. Regular checks every few months keep brakes responsive and safe during rides.
Conclusion
Adjusting caliper bicycle brakes helps keep your bike safe and smooth. Regular checks prevent brake problems and improve riding comfort. Use the simple steps shared here to fix your brakes. Small adjustments can make a big difference in stopping power.
Take your time and be patient with the process. Your bike will respond better and stop more reliably. Enjoy safer rides knowing your brakes work well every time. Keep practicing these tips to maintain your bike’s brakes easily.