Are your bike’s disc brakes feeling a bit off? Maybe they squeak, rub, or don’t stop as smoothly as they should.
Knowing how to adjust your disc brakes can make your rides safer and more enjoyable. In this guide, you’ll learn simple, step-by-step tips to get your brakes working perfectly again. Whether you’re a beginner or just need a quick refresher, this article will help you fix your brakes fast and with confidence.
Keep reading—you’re just minutes away from smoother, safer rides!
Credit: www.purecycles.com
Tools Needed
Adjusting disc brakes on a bicycle requires a few simple tools. Having the right tools makes the job easier and faster. Each tool plays a specific role in the adjustment process.
Gathering these tools before starting helps avoid interruptions. It also ensures you can complete the brake adjustment smoothly.
Hex Wrenches (allen Keys)
Hex wrenches are essential for most bike repairs. They fit the bolts on your brake caliper and rotor. Sizes 4mm and 5mm are the most common for disc brakes. Keep a set nearby for easy access.
Torx Wrench
Some disc brakes use Torx bolts instead of hex bolts. A T25 Torx wrench fits most brake rotor bolts. This tool helps tighten or loosen these bolts safely.
Screwdrivers
A small Phillips or flathead screwdriver helps with fine adjustments. Some brake calipers have screws for pad alignment. Use the screwdriver to make precise changes.
Bike Stand
A bike stand holds your bike steady while you work. It lifts the wheel off the ground. This makes spinning the wheel and testing brakes easier.
Cleaning Supplies
Clean brake parts before adjusting. Use rubbing alcohol and a clean cloth. Dirt and oil can reduce brake performance. Clean parts ensure smooth and safe braking.
Types Of Disc Brakes
Disc brakes are a popular choice for many cyclists. They offer strong stopping power and work well in wet conditions. There are two main types of disc brakes. Each type has unique features and ways to adjust them. Knowing these types helps you maintain your bike better.
Mechanical Disc Brakes
Mechanical disc brakes use a cable to pull the brake pads. The cable moves when you squeeze the brake lever. This action pushes the brake pads against the rotor. Mechanical brakes are simple to adjust and fix. You can tighten or loosen the cable to change the brake feel. These brakes are common on many bikes and cost less.
Hydraulic Disc Brakes
Hydraulic disc brakes use fluid to move the brake pads. When you press the brake lever, fluid pushes pistons inside the caliper. The pistons push the brake pads against the rotor. Hydraulic brakes offer smoother and stronger braking. They need less hand force to stop the bike. Adjusting hydraulic brakes is more complex. It may require bleeding the brake fluid to remove air bubbles.
Signs Of Brake Issues
Disc brakes need regular checks to keep your ride safe. Brake problems can start small but get worse fast. Spotting signs early helps fix brakes before they fail.
Knowing the signs of brake issues saves time and money. It also keeps your bike working smoothly. Here are common signs that your disc brakes need attention.
Unusual Noises
Squealing or grinding sounds mean brake parts may be dirty or worn out. These noises happen when pads rub unevenly on the rotor. Clean the brakes or replace pads if sounds persist.
Reduced Stopping Power
If your bike takes longer to stop, the brakes may be weak. Soft brake levers or a long lever pull can cause this. Adjusting brake pads or checking fluid levels can restore strength.
Brake Lever Feels Spongy
A spongy brake lever means air might be in the brake lines. This reduces braking efficiency and control. Bleeding the brakes removes air and improves lever feel.
Brake Pads Touching Rotor Constantly
Pads that rub the rotor even without pulling the brake cause friction. This slows you down and wears parts quickly. Adjust the caliper position to stop constant contact.
Visible Wear On Brake Pads
Thin or uneven brake pads need replacement. Check the pad thickness often. Worn pads can damage rotors and reduce braking power.

Credit: www.youtube.com
Preparing The Bike
Preparing your bike for disc brake adjustment is the first step to better braking. A clean and stable bike makes the process easier and safer. Take time to set up your bike right before you start adjusting the brakes.
Follow these steps to get your bike ready for brake tuning.
Clean The Brake Area
Dirt and grease can affect brake performance. Use a clean cloth and some rubbing alcohol to wipe the rotor and caliper. Avoid touching the rotor with your bare hands. Clean parts help you see problems and fix them well.
Secure The Bike
Place your bike on a stand or lean it against a wall. This keeps it steady and prevents it from moving. A stable bike makes brake adjustment more accurate and safer for you.
Check The Wheel Alignment
Make sure the wheel is properly seated in the dropouts. The rotor should sit evenly between brake pads. Spin the wheel to see if it moves freely without rubbing. Correct alignment saves time during brake adjustment.
Gather Necessary Tools
Prepare all tools before starting. You may need an Allen wrench, screwdriver, and clean cloth. Having tools ready helps you work smoothly without interruptions.
Adjusting Mechanical Disc Brakes
Adjusting mechanical disc brakes on a bicycle keeps your ride safe and smooth. These brakes use a cable to pull the brake pads against the rotor. Over time, the cable may stretch or the pads may wear down. Simple adjustments help maintain good stopping power.
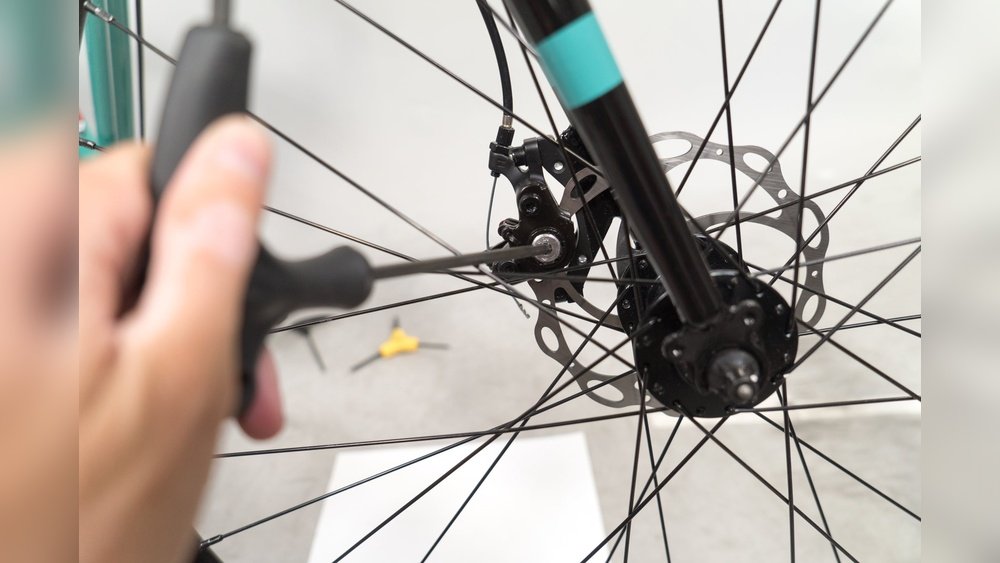
Aligning The Caliper
Start by loosening the bolts that hold the caliper to the frame. Squeeze the brake lever to center the caliper over the rotor. Keep the lever squeezed and tighten the bolts. This step ensures the pads line up evenly with the rotor. Check for any rubbing sounds when the wheel spins.
Tightening The Cable
Check the brake cable for slack. Use the barrel adjuster near the brake lever to remove slack. Turn it clockwise to tighten the cable. If more tightening is needed, loosen the cable bolt on the caliper. Pull the cable tight by hand. Retighten the bolt securely. Test the brake lever for firmness and response.
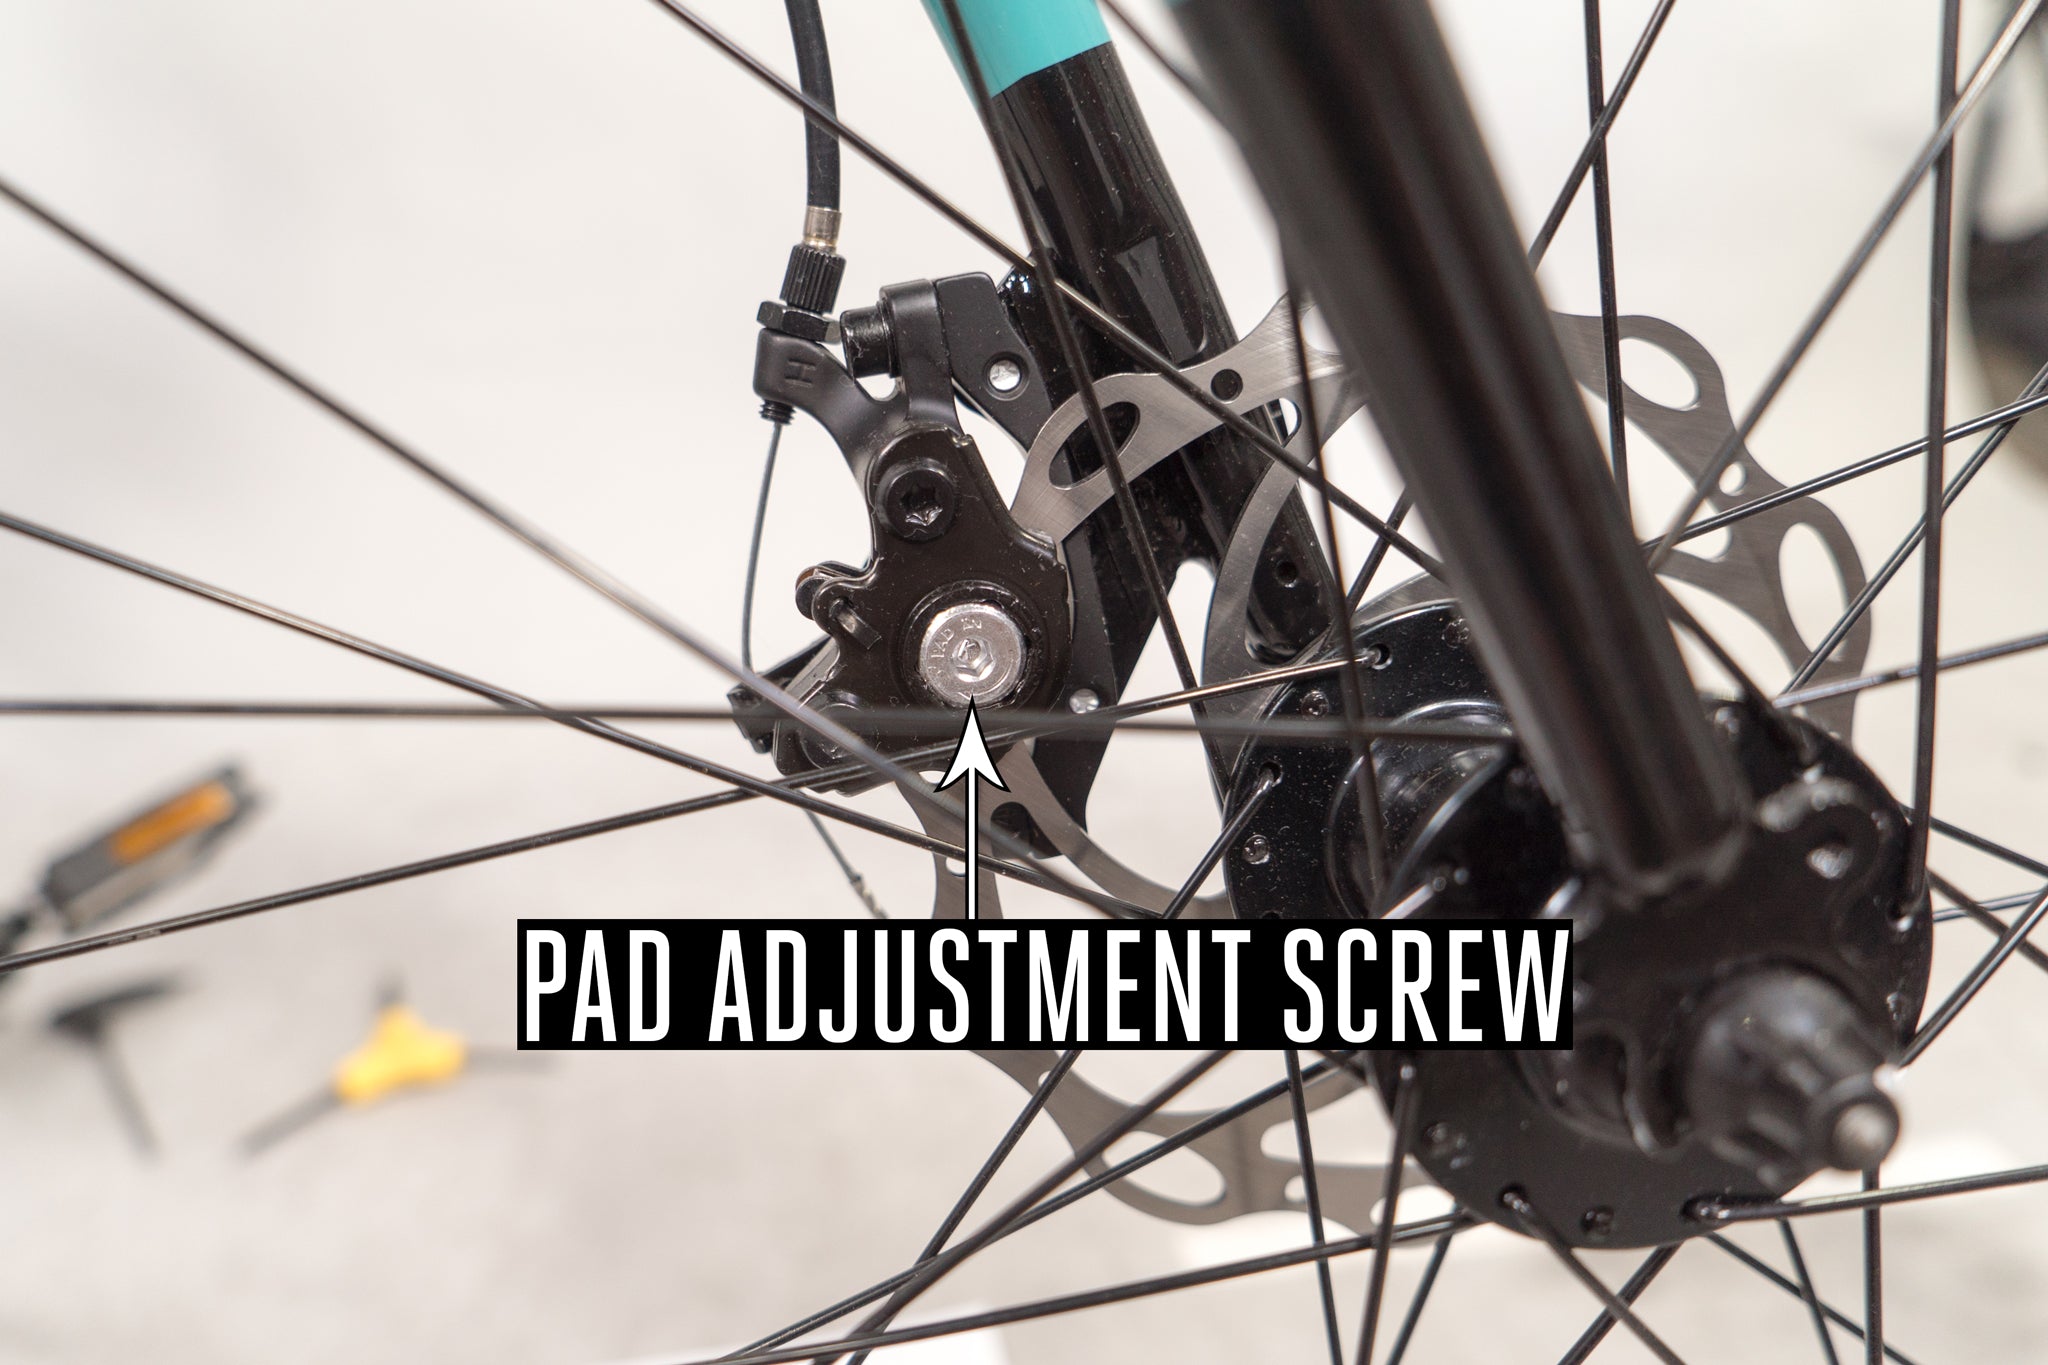
Fine-tuning The Brake Pads
Check the distance between the brake pads and rotor. Pads should be close but not touching the rotor when the brake is off. Use the pad adjustment screws on the caliper to move pads closer or farther. Spin the wheel and make small changes. Stop when the pads grip the rotor well without rubbing.
Adjusting Hydraulic Disc Brakes
Adjusting hydraulic disc brakes keeps your bike safe and responsive. These brakes use fluid to transfer force from the lever to the brake pads. Proper adjustment ensures smooth braking and better control. Follow these steps to adjust your hydraulic disc brakes correctly.
Centering The Caliper
Start by loosening the caliper bolts slightly. Squeeze the brake lever to center the caliper on the rotor. Keep the lever squeezed and tighten the bolts evenly. Release the brake lever and spin the wheel. The rotor should not rub the brake pads. If rubbing occurs, repeat the process.
Bleeding The Brake System
Air in the brake lines causes spongy brakes. Bleeding removes air and old fluid. Use a brake bleed kit made for your brake brand. Attach the kit to the bleed valve and lever. Pump new brake fluid through the system slowly. Watch for air bubbles and keep the fluid level steady. Close the valves tightly when done.
Adjusting The Brake Lever Reach
Brake lever reach affects comfort and control. Locate the reach adjustment screw near the lever. Turn the screw clockwise to bring the lever closer. Turn it counterclockwise to move the lever farther. Test the brake lever until it feels right for your hand size.
Testing Brake Performance
Testing brake performance is a crucial step after adjusting your bicycle’s disc brakes. It ensures your brakes work well and keep you safe. Proper testing helps spot issues before riding on busy roads or rough trails.
Start by checking the brake response. The brake should engage quickly when you squeeze the lever. It must stop the wheel smoothly without any delay. A good brake response gives confidence and control.
Check Brake Lever Feel
Squeeze the brake lever firmly. It should feel firm, not spongy or soft. A soft lever may mean air is in the brake line or pads need adjustment. The lever should not touch the handlebar when fully pressed.
Test Wheel Stopping Power
Lift the bike so the wheel spins freely. Pull the brake lever to stop the wheel. The wheel must stop quickly and hold still. If the wheel keeps spinning, adjust the brake pads or caliper position.
Ride And Brake Gently
Ride the bike slowly on a flat surface. Apply the brakes gently to test their power. The bike should slow down smoothly without pulling to one side. Listen for any strange noises like squeaks or rubbing.
Inspect For Brake Drag
Spin the wheel and watch for rubbing sounds. Brakes should not rub on the rotor when released. If you hear rubbing, realign the caliper or check pad clearance. Brake drag wastes energy and wears parts faster.

Credit: www.wikihow.com
Maintenance Tips
Maintaining disc brakes is key for safe and smooth riding. Regular care keeps brakes strong and reliable. Simple steps help avoid common problems like squeaking or poor stopping power.
Clean, check, and adjust your brakes often. This ensures better performance and longer brake life. Small efforts can save you from costly repairs later.
Cleaning The Brake Rotors
Use a clean cloth and rubbing alcohol to wipe the rotors. Dirt and oil reduce braking power. Avoid touching rotors with bare hands. Keep them dry and free from grease.
Inspecting Brake Pads
Look for wear on brake pads regularly. Thin or uneven pads need replacement. Check for dirt or debris stuck in the pads. Clean or change them to keep brakes effective.
Adjusting Brake Calipers
Loosen caliper bolts slightly to center the caliper over the rotor. Squeeze the brake lever to align pads evenly. Tighten bolts while holding the lever. This prevents rubbing and improves braking.
Checking Brake Fluid (hydraulic Brakes)
Check the brake fluid level in the reservoir. Low fluid can cause weak brakes. Top up with the correct fluid type if needed. Bleed the brakes to remove air bubbles for firm stopping.
After adjustments, test brakes in a safe area. Squeeze levers and check for quick, smooth stops. Listen for unusual noises. Repeat adjustments if brakes feel soft or noisy.
Frequently Asked Questions
How Do I Know When Disc Brakes Need Adjustment?
If your brakes feel spongy or don’t stop well, they likely need adjustment. Listen for rubbing sounds or uneven braking. Regular checks ensure safety and optimal performance.
What Tools Are Needed To Adjust Bicycle Disc Brakes?
You typically need an Allen wrench, a screwdriver, and sometimes a bike stand. These tools help align the caliper and tighten bolts properly for effective brake adjustment.
Can I Adjust Disc Brakes Without Removing The Wheel?
Yes, minor adjustments can be done with the wheel on. Loosen the caliper bolts, align the pads evenly, and tighten back. For major fixes, removing the wheel might be necessary.
How Often Should I Adjust My Bicycle Disc Brakes?
Adjust brakes every few months or after heavy riding. Regular maintenance prevents wear and keeps braking smooth. Frequent checks improve safety and prolong brake life.
Conclusion
Adjusting disc brakes on your bicycle keeps rides smooth and safe. Check the brake pads and rotors often. Tighten bolts and align parts carefully. Small adjustments make a big difference in stopping power. Practice these steps a few times to gain confidence.
Your bike will respond better on every ride. Stay patient and take your time. Good brake care means a safer journey ahead.