Is your bicycle brake feeling loose or unresponsive? That shaky grip can make riding unsafe and stressful.
But don’t worry—you can fix it yourself quickly and easily. In this guide, you’ll learn simple steps to tighten your bicycle brake and get back to smooth, confident stops. Keep reading, and you’ll discover how a small tweak can make a big difference in your ride’s safety and control.
Credit: www.cycleplan.co.uk
Types Of Bicycle Brakes
Bicycle brakes come in different types. Each type works in a unique way. Knowing the type helps you tighten brakes properly. This makes your ride safer and smoother.
Rim Brakes
Rim brakes press pads against the wheel rim. They use cable tension to pull the pads. These brakes are common on many bikes. They are simple to adjust and maintain. Tightening rim brakes means adjusting cable tension and pad position.
Disc Brakes
Disc brakes use a rotor attached to the wheel hub. Brake pads squeeze the rotor to stop the bike. These brakes offer strong stopping power. They work well in wet and muddy conditions. Tightening disc brakes involves adjusting the caliper and cable or hydraulic system.
Drum Brakes
Drum brakes sit inside the wheel hub. They use shoes that press outward to stop the wheel. These brakes are low maintenance and last long. They are less common but reliable. Tightening drum brakes means adjusting the brake shoes inside the hub.

Credit: www.youtube.com
Tools Needed
Tightening bicycle brakes needs the right tools for safety and ease. Having the correct tools saves time and ensures the brakes work well. Some tools are common in most toolboxes. Others are made just for bikes. Gather these before starting the brake adjustment.
Basic Tools
Basic tools include items found in many homes. An adjustable wrench helps loosen or tighten bolts. A set of Allen keys (hex wrenches) fits most bike brake bolts. A flat-head screwdriver is useful for fine adjustments. A clean rag helps wipe dirt from brake parts. These tools cover most brake tightening tasks.
Specialized Tools
Specialized tools make brake work easier and precise. A cable puller or noodle helps tighten brake cables quickly. A bike stand holds the bike steady for better access. A torque wrench ensures bolts are tightened correctly. These tools are worth investing in for frequent bike maintenance.
Inspecting Brake Components
Before tightening your bicycle brake, check all brake parts carefully. This step ensures your brakes work well and keep you safe. Inspecting each part helps find problems early. Fix small issues before they get worse. Let’s explore the main brake components to inspect.
Brake Pads
Look closely at the brake pads. Are they worn down or cracked? Pads should have enough thickness to grip the wheel rim. Replace pads if they look thin or damaged. Clean any dirt or debris on the pads. Dirty pads reduce braking power and can cause noise.
Brake Cables
Check the brake cables for rust or fraying. Smooth cables allow better brake movement. Rusty or broken cables can cause brakes to stick or fail. Move the brake lever and watch the cable. It should move smoothly without catching or slipping. Replace damaged cables right away.
Brake Levers
Test the brake levers on your handlebars. They should move easily and return quickly. Tighten any loose bolts on the levers. Loose levers reduce control and can be dangerous. If the lever feels stiff or sticky, clean and lubricate it. Proper lever function makes braking safe and reliable.
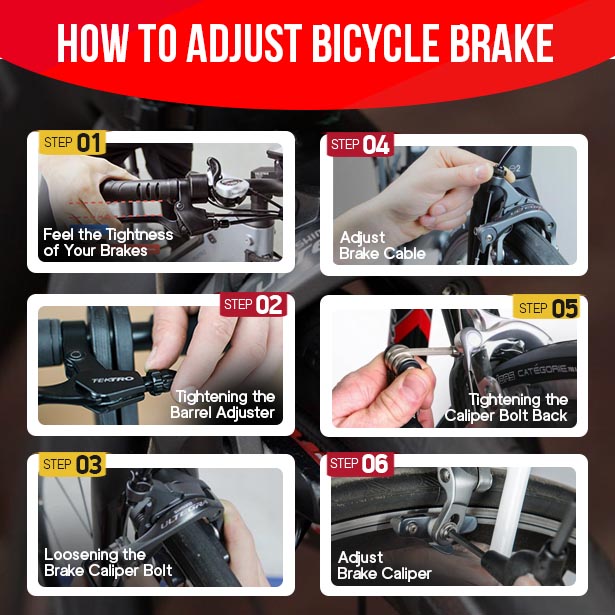
Tightening Rim Brakes
Tightening rim brakes is a key step to keep your bike stopping well. These brakes press pads against the wheel rim to slow down or stop the bike. Over time, brake pads can wear out or cables may stretch. This causes loose brakes and longer stopping distances. Fixing this is simple and improves safety.
Focus on three main areas: brake pads, cables, and levers. Each part plays a role in brake tightness. Small adjustments make a big difference in brake response. Follow these steps to tighten your rim brakes quickly.
Adjusting Brake Pads
Check the brake pads first. They should touch the rim squarely and evenly. If pads hit the tire or miss the rim, adjust their position. Loosen the pad mounting bolt. Move the pad to align with the rim surface. Tighten the bolt again, but do not over-tighten. Pads must sit flat on the rim for best grip.
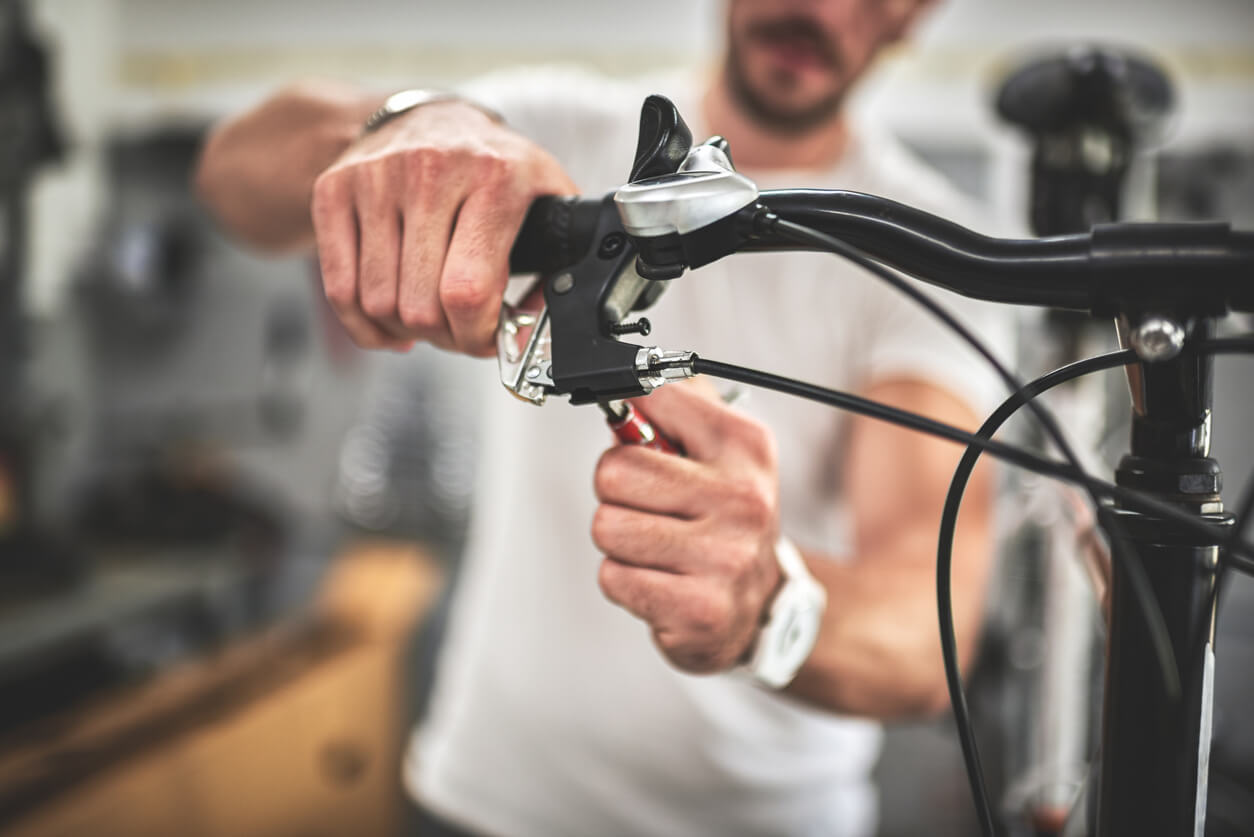
Tightening Brake Cables
Brake cables can stretch with use. This makes brakes feel loose or soft. Start by loosening the cable anchor bolt on the brake arm. Pull the cable tight by hand, removing slack. Tighten the anchor bolt firmly to hold the cable in place. Test the brake lever to check cable tension. Repeat if needed until the brakes feel firm.
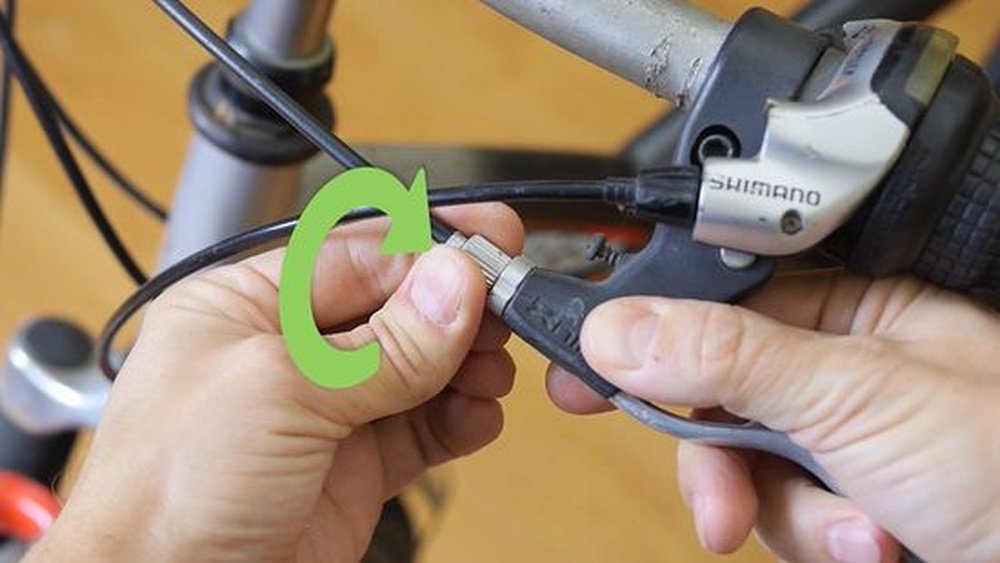
Fine-tuning Brake Levers
Brake levers often have a small barrel adjuster. Turn this adjuster to fine-tune cable tension. Screw it out to tighten the brake cable slightly. Screw it in to loosen the cable. Adjust until the brake lever feels firm but not too hard to pull. This lets you control braking smoothly and safely.
Tightening Disc Brakes
Tightening disc brakes keeps your bike safe and stops it well. Disc brakes need careful adjusting for smooth rides and strong braking power. Small changes to the brake parts can improve their grip and response.
Check your disc brakes often. This avoids noise and slow stopping. Follow these steps to tighten your disc brakes easily.
Adjusting Calipers
Loosen the bolts that hold the caliper to the frame. Squeeze the brake lever hard to center the caliper over the disc. Hold the lever and tighten the bolts again. This centers the caliper and stops rubbing on the disc.
Aligning Brake Pads
Check the brake pads for wear and position. Pads should touch the disc evenly on both sides. If pads do not line up, loosen their bolts. Move pads closer or farther from the disc. Tighten the bolts once pads are aligned.
Bleeding Hydraulic Brakes
Hydraulic brakes may feel soft if air enters the system. Use a brake bleed kit to remove air bubbles. Follow the kit instructions step by step. This restores strong brake pressure and improves control.
Credit: blog.rodalink.com
Testing Brake Performance
Testing brake performance is essential after tightening your bicycle brakes. It ensures safety and smooth riding. Simple checks can reveal if the brakes work well or need more adjustment. Take time to test in a safe area before riding on busy roads.
Brake Response Check
Start by squeezing the brake lever firmly. Notice how quickly the brake pads touch the wheel rim or disc. The brake should stop the wheel quickly without needing too much force. If the lever feels loose or the brakes delay, tighten the cable or pads again. Repeat this test until the brake feels firm and responsive.
Noise And Vibration Inspection
Listen carefully when applying the brakes. A clean brake should not make loud noises or squeak. Vibration or rattling sounds mean the brake pads might be loose or misaligned. Adjust the pads so they contact the rim evenly. Check for any dirt or debris on the brake pads and wheel surface, as they can cause noise. Quiet brakes mean better control and safer rides.
Maintenance Tips
Keeping your bicycle brakes tight and responsive requires regular care. Simple maintenance helps your brakes work better and last longer. Follow these tips to keep your brakes in top shape and ensure safe rides.
Regular Inspections
Check your brakes often for signs of wear or damage. Look at the brake pads and cables. Make sure the brake levers feel firm when pressed. Test your brakes before every ride to avoid surprises.
Lubrication
Keep brake parts moving smoothly with light lubrication. Apply oil to the brake cable and pivot points. Avoid over-lubricating, as too much oil can attract dirt. Clean old grease before adding new oil for best results.
Replacing Worn Parts
Replace brake pads when they become thin or uneven. Worn pads reduce stopping power and can damage the wheel rim. Change frayed or rusty cables immediately. Fresh parts improve brake performance and safety.
Frequently Asked Questions
How Do I Know When My Bicycle Brakes Need Tightening?
If your brake lever feels loose or the bike takes longer to stop, the brakes likely need tightening. Check for excessive brake pad wear or cable slack. Properly adjusted brakes ensure safe and effective stopping power.
What Tools Are Needed To Tighten Bicycle Brakes?
You typically need an Allen wrench or a screwdriver to adjust brake tension. Some bikes may require a 10mm wrench for cable bolts. A clean rag and bike lubricant can help during the process.
How Can I Tighten Cable Brakes On My Bike?
Loosen the cable anchor bolt, pull the brake cable tighter, then retighten the bolt. Test the brake lever for proper tension. Adjust cable tension gradually to avoid over-tightening and ensure smooth brake operation.
Can I Tighten Disc Brakes The Same Way As Rim Brakes?
No, disc brakes require different adjustments, often involving caliper alignment and rotor spacing. Tightening cables applies only to rim brakes. Always consult your bike’s manual for specific disc brake maintenance instructions.
Conclusion
Tightening your bicycle brake keeps you safe on every ride. Small adjustments can improve brake performance quickly. Check brake pads and cables often to stay secure. Practice tightening steps regularly to feel more confident. Well-maintained brakes help you stop smoothly and avoid accidents.
Remember, safety matters most when cycling. Keep your bike brakes tight and enjoy every journey.