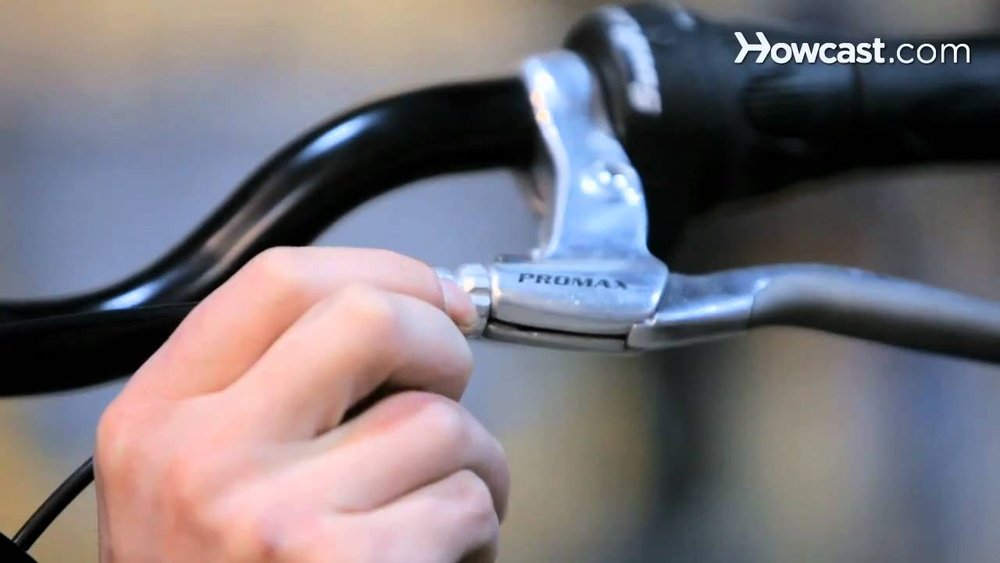
Are your bicycle brakes feeling loose or unresponsive? This can be frustrating and even dangerous when you need to stop quickly.
The good news is, tightening your bike brakes is easier than you think. With just a few simple steps, you can make your brakes work like new again. Keep reading, and you’ll learn exactly how to tighten your bicycle brakes quickly and safely—so you can ride with confidence every time.
Credit: blog.rodalink.com
Signs Of Loose Bicycle Brakes
Loose bicycle brakes can be dangerous. They reduce your control and increase stopping distance. Recognizing the signs early keeps you safe on the road. Watch for clear clues that your brakes need tightening.
Squeaky Or Spongy Brake Levers
Squeaky brake levers often mean loose or worn parts. The noise signals friction or lack of proper adjustment. Spongy levers feel soft or mushy when pressed. This happens if brake cables or hoses are loose or stretched. These symptoms show your brakes are not working firmly.
Excessive Lever Travel
Excessive lever travel means you must pull the brake lever too far. This happens when cables slacken or brake pads wear down. You may notice the lever almost touching the handlebar before brakes engage. This long travel reduces brake power and control.
Brake Pads Not Gripping Properly
Brake pads that do not grip wheels tightly cause poor braking. They might touch the rim unevenly or miss the rim completely. Loose brakes let your bike slide instead of stopping quickly. Uneven pad wear or loose bolts often cause this issue.
Tools Needed For Brake Tightening
Tightening bicycle brakes requires some basic tools. Having the right tools makes the job easier and safer. Each tool has a specific role in adjusting and fixing your brakes.
Use quality tools to avoid damaging your bike parts. Keep tools clean and ready before starting the work. This helps you finish the task smoothly and quickly.
Allen Wrenches
Allen wrenches, also called hex keys, are essential for brake tightening. They fit into small bolts on your brake system. Most bikes use 4mm or 5mm sizes. Use them to loosen or tighten brake caliper bolts and brake levers.
Screwdrivers
Screwdrivers help adjust the brake pads and cable tension. Both flathead and Phillips head screwdrivers are useful. They turn small screws that control brake pad position and cable tightness. Choose the right size to avoid stripping screws.
Cable Cutters
Cable cutters are needed to trim brake cables cleanly. Sharp and precise cuts prevent cable fraying. Frayed cables can cause poor braking or damage. Use cable cutters only for cables, not wires or bolts.
Lubricants
Lubricants keep brake parts moving smoothly. Apply a small amount to pivot points and cables. This reduces friction and wear. Avoid over-lubricating, as it attracts dirt and dust. Use bike-specific lubricants for best results.
Adjusting Cable Tension
Adjusting cable tension is key to tightening bicycle brakes. It controls how close the brake pads get to the wheel rim. Proper tension makes braking smooth and safe. Too loose, and the brakes feel weak. Too tight, and the brakes may drag or wear out quickly.
This section explains how to adjust the cable tension using the barrel adjuster. Follow these steps to get your brakes working just right.
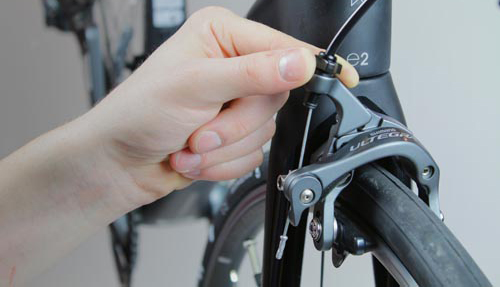
Locating The Barrel Adjuster
The barrel adjuster is a small, round part on the brake lever or caliper. It looks like a ridged cylinder. You can turn it by hand without tools. Some bikes have it on the handlebar brake lever. Others place it near the brake caliper on the wheel.
Finding this part is the first step to adjusting the cable tension. Check both places carefully.
Turning The Barrel Adjuster
Turn the barrel adjuster counterclockwise to tighten the brake cable. This moves the brake pads closer to the rim. Turn it only a little at a time. One or two full turns are usually enough.
Turn clockwise to loosen the cable if the brakes feel too tight. Avoid turning it too far. This may cause the brake to rub on the wheel constantly.
Checking Brake Lever Feel
After adjusting, squeeze the brake lever gently. The lever should feel firm but not too hard. The brakes should engage before the lever hits the handlebar.
If the lever feels too loose, tighten the barrel adjuster more. If too stiff, loosen it slightly. Test the brakes by spinning the wheel and squeezing the lever.
Credit: bicyclenetwork.com.au
Tightening Brake Cable Manually
Tightening the brake cable manually is a simple way to improve your bike’s stopping power. This process adjusts the brake cable to make the brakes firmer and more responsive. A tight cable ensures the brake pads touch the wheel rim quickly and evenly.
Follow these clear steps to tighten the brake cable yourself. No special tools or skills needed. Just careful handling and a bit of patience.
Loosening The Cable Anchor Bolt
Start by finding the cable anchor bolt on the brake arm. Use a wrench or Allen key to loosen it. Loosen it just enough to free the cable. Do not remove the bolt completely. This step allows you to pull the cable tighter.
Pulling The Cable Tight
Hold the brake cable firmly with your fingers. Pull the cable away from the brake arm. Pull it tight, but do not overdo it. The brake pads should move closer to the wheel rim. Check the brake lever; it should feel firmer now.
Securing The Cable
While holding the cable tight, retighten the anchor bolt. Use your wrench or Allen key to secure it firmly. Double-check the cable tension by squeezing the brake lever. The brakes should engage quickly and stop the wheel smoothly.
Aligning Brake Pads
Aligning brake pads is a key step to tighten bicycle brakes. Proper alignment ensures strong stopping power and safety. Misaligned pads can cause poor braking and wear down tires.
Focus on the position, angle, and contact of the brake pads. Each part affects how well your brakes work. Take your time to adjust pads carefully for better control and comfort.
Checking Pad Position
Start by checking if the brake pads sit correctly on the rim. Pads should touch the rim surface, not the tire or air valve. Position them so the entire pad contacts the rim evenly.
Look for any gaps or spaces between the pad and rim. Move the pad closer or further until it fits just right. Proper placement helps brakes grab the wheel firmly.
Adjusting Pad Angle
Next, adjust the angle of the brake pads. Pads should be slightly tilted, with the front edge touching first. This is called “toe-in” and reduces squeaking sounds.
Loosen the pad bolt, tilt the pad slightly, then tighten it again. Test the brakes by squeezing the lever. Change the angle if the noise or braking feels off.
Ensuring Even Pad Contact
Make sure both pads hit the rim at the same time. Uneven contact can cause wobbling or weak braking. Squeeze the brake lever and watch the pads closely.
Adjust the brake arms or pad holders to balance their movement. Even contact improves brake power and extends pad life. Check this regularly for consistent performance.
Testing Brake Performance
Testing brake performance is essential after tightening your bicycle brakes. It ensures your brakes work safely and effectively. This step helps you feel confident while riding. You can catch any issues before hitting the road.
Squeezing The Brake Lever
Start by gently squeezing the brake lever. It should feel firm and not too loose. The lever should move smoothly without sticking. Check if the brakes engage quickly when you pull the lever. If the lever pulls too close to the handlebar, your brakes need more tightening.
Checking Stopping Distance
Ride your bike at a slow speed. Then, apply the brakes to stop. Notice how far your bike travels before stopping. A short stopping distance means good brake performance. If the distance is long, your brakes may need adjustment or more tightening.
Making Final Adjustments
Based on the test, fine-tune your brake cables or pads. Tighten cables slightly if the brake lever feels loose. Adjust the brake pads to align properly with the wheel rim. Repeat the squeeze and stop test until the brakes work well. Proper brake testing keeps you safe on every ride.
Maintaining Brake Components
Maintaining brake components is key to keeping bicycle brakes tight and safe. Regular care helps brakes work smoothly and last longer. Simple steps can prevent problems and save repair costs.
Cleaning Brake Pads And Rims
Brake pads and rims collect dirt and dust over time. Clean them with a cloth and rubbing alcohol. This removes grime that lowers braking power. Avoid oily substances that make brakes slippery. Clean surfaces help brakes grip better and stop faster.
Lubricating Moving Parts
Brake levers and cables need light lubrication. Use a small amount of bike-specific lubricant on pivots and cable ends. This stops parts from sticking or rusting. Do not put oil on brake pads or rims. Proper lubrication keeps brake parts moving freely and reduces wear.
Replacing Worn Brake Pads
Worn brake pads lose stopping power and can damage rims. Check pads for cracks or thin surfaces. Replace pads if they look worn or uneven. New pads improve brake grip and safety. Changing pads is an easy way to keep brakes tight and reliable.

Credit: www.wikihow.com
Frequently Asked Questions
How Do I Know If My Bicycle Brakes Need Tightening?
You should tighten your bike brakes if the brake lever feels loose or the brakes don’t stop the bike quickly. Also, check if the brake pads don’t touch the rim properly or if the cables appear slack. These signs mean your brakes need adjustment.
What Tools Are Required To Tighten Bicycle Brakes?
To tighten bicycle brakes, you need an Allen wrench, a screwdriver, and sometimes pliers. These tools help adjust the brake cable tension and reposition the brake pads for better contact with the wheel rim.
Can I Tighten Brakes On All Types Of Bicycles?
Yes, you can tighten brakes on most bicycles, including road, mountain, and hybrid bikes. However, the adjustment method varies by brake type, such as rim brakes or disc brakes, so follow specific instructions for your brake system.
How Often Should I Tighten My Bicycle Brakes?
You should check and tighten your bicycle brakes every few months or after heavy use. Regular maintenance ensures safe braking performance and prevents brake wear, especially if you ride frequently or in wet conditions.
Conclusion
Tightening bicycle brakes keeps you safe on every ride. Check your brake pads and cables regularly. Adjust the tension carefully for better stopping power. Small fixes make a big difference in brake performance. Practice these steps to feel confident while cycling.
A well-maintained brake system helps avoid accidents. Keep your bike ready and enjoy smooth, controlled rides. Simple care saves time and money in the long run. Stay alert, ride safely, and keep your brakes tight.